If you’ve just started screen printing tees as a hobby, or intend to set up shop in the future, then learning how to properly cure screen printed T-shirts is a must.
Curing is the crucial final step, not just in the screen printing process but in all printing environments where drying ink is concerned.
Now that you understand the general idea of curing, let’s dive in a bit more as things can become tricky when we deal with different inks, fabric type, temperature setting and time.
Let’s take a look at the profiles of the two most common inks used in screen printing t-shirts – plastisol and water-based ink.
- Plastisol – known to be durable, thick and versatile. Provides vivid colors.
- Water-Based – less opaque, offers a soft-hand feel, fashion forward and eco-friendly.
In order for the ink particles to gel well with a garment, it needs to reach a certain temperature.
Read more: Screen Printing Ink Types You Need To Know
Plastisol ink typically cures at around 290 – 330 degrees Fahrenheit, while water-based inks start curing at 320 degrees Fahrenheit. Although it requires a higher curing temperature, water-based inks will start to air-dry immediately while plastisol, since it is oil based, won’t.
Regardless, to get both ink to bind to a garment on a molecular level, you’ll need to employ a heating method to reach desired temperatures.
7 Creative Methods To Cure Screen Printed T-Shirts
1. Au Naturale – Air Dry
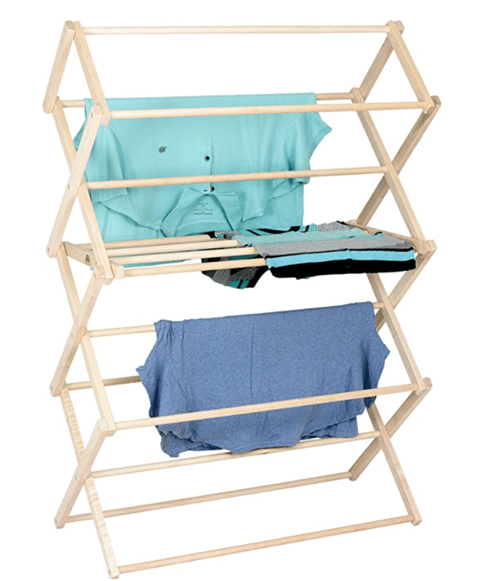
This is the easiest method of drying and curing t-shirts, but it only works for water-based screen printing inks. All you need to do is simply hang or rack your t-shirts accordingly.
It is also recommended to prop a fan up to create airflow to expedite the drying process. If you do this, do not aim the fan directly at the t-shirts as it might cause them to move and smear against one another and risk wet ink from smudging.
Like I mentioned before, this may be the easiest method of curing, but it might not be the best.
Some water-based inks require more heat so if you’re going to air dry, make sure to get those with fast drying additives added. This will allow the ink to achieve a full cure after 24-48 hours of air-exposure. However, printing with this type of fast drying ink will require a high degree of skill and technique compared to regular water based ink.
Bottom line, if you’re going to use regular water-based inks and want to air dry, try combining it with one of the following cure methods below. Read on
Cure Scale: 2/5
2. Oven-baked T-shirts
You’ve probably seen videos of people curing t-shirts in their kitchen oven. Yes I agree, it sounds weird and not very practical, but it actually works!
Nevertheless, using an oven isn’t recommended. For one, it’s very possible that you might end up with a burnt shirt if you’re not careful. Most home ovens are unable to produce constant and even heating, so some parts of your design may not cure as well as other spots.
Also, if you decide to cure plastisol ink in the same oven you use for baking and broiling, the released chemicals can definitely be a health hazard.
However, if it is your only option and you don’t intend to be mass producing in bulk, here’s what you need to do:
- Place your screen printed t-shirt on the oven’s tray. Using a three-leveled oven as an example, place the tray on the middle rack.
- Set your oven to the desired temperature by using the ink manufacturer’s guidelines. Once turned on, keep an eye on your garment so as to not let it char or burn.
- You’ll soon notice some vapor or smoke. This is the water being released from the ink pigments (if you’re using water-based inks)
- Check to see if ink has reached the desired temperature. I suggest investing in a temperature gun to make monitoring easier.
- Once the garment is cured, pull it off the tray and let it cool down. Perform a stretch test. For plastisol prints, if you see the ink breaking apart, pop it back into the oven for a second bake using steps 1 to 4 again.
Cure Scale: 3.5/5
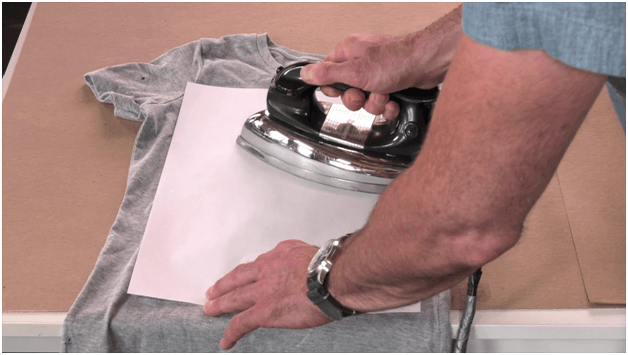
3. The old school – using an Iron
Another inexpensive way to cure screen printed t-shirts is using an iron. Since a standard iron can reach temperatures of up to 350 or 400 degrees Fahrenheit, it can get the job done however there are limitations. Similarly to using a kitchen oven, you do have to be extra careful in monitoring your garment.
Not only that, an iron’s surface is relatively small so it probably will not work if you’re trying to cure larger designs. So to those of you opting for this method, go with smaller designs like logos or symbols.
For curing plastisol ink
- ‘Gel’ the ink first before doing the actual curing. Gelling means bringing the ink to a semi-dried state. Do this by hovering the iron over the ink a few inches above. Be careful it does not come into contact with the wet ink.
- Check the ink’s temperature using a temperature gun.
- Once the entire image is semi-dried, place a piece of parchment paper over the design.
- Iron over the design for a minute or two and monitor the temperature. Repeat if it doesn’t hit the curing temperature.
For curing water-based inks
- Skip the gelling portion and allow your print to air-dry. The longer the better, but I typically leave it for 15-30 minutes.
- Again, place a parchment paper over the design and hit it with the iron for 2-5 minutes. Again, monitor the temperature using the temp gun.
- Move the iron around so that every part of the design is heated.
A common problem with using an iron is the risk of scorching some areas while under-curing others.
In addition, some iron may not give enough heat to fully cure the ink. So, if you’re just printing shirts for yourself and are not worried about the ink disappearing gradually, then iron is the cheapest option.
Cure Scale: 3/5
4. Quick and Handy Hair Dryer
Here’s another curing technique that’s popular with diy screen printers – using a regular hair dryer.
It’s convenient, safer than an iron and you probably have one in your closet!
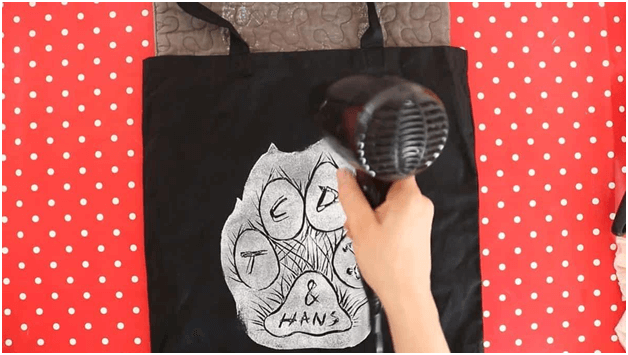
The bad news is, hair dryers aren’t ideal for high temperature curing and even commercial ones typically max out at 100-140 degrees Fahrenheit. So if you’re printing with plastisol inks, definitely skip this method.
For water-based inks however, using a hair-dryer is still a somewhat viable option. This is where you’ll want to use a low-cure water based ink that will cure way below the typical 300 degrees Fahrenheit. But even so, getting to the desired curing temperature will definitely take a long time.
Another setback of using a hairdryer is ink bleeding, caused by the rapid air blowing. In closing, even though you could, you shouldn’t and I’d save this method for one-off art projects.
Cure Scale: 2/5
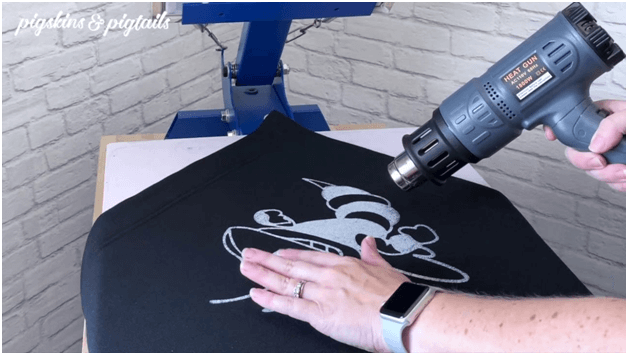
5. The Wannabe – Heat Gun
A huge step up but still within budget, the most popular way of curing ink on a budget is to use an industrial heat gun.
These portable heat machines are basically small flash units and even entry-level ones like this will have the ability to reach up to 1200 degrees Fahrenheit! That’s plenty of heating power for what we need.
But popular doesn’t always mean efficient.
If you’re thinking about producing batches of t-shirts or curing larger sized screen prints, think again. Curing with a heat gun can be hugely time consuming. Also, when you have a larger print area to cover, it will be difficult to maintain heat consistency throughout. Plus, if you point too close, the risk of scorching the garment becomes too real!
If you’re using this method, I suggest practicing on scrap clothing or unwanted garments first. Pay attention to distance and how far you need to hold the heat gun. And always, keep your temperature gun nearby so you don’t overheat!
Cure Scale: 4/5
6. Thee One-stop Heat Shop – The Halogen Lamp
I’ve spoken to many diy-ers and shoop owners who swear by the halogen lamp. I too, started out this way only because I already had a couple in my backyard.
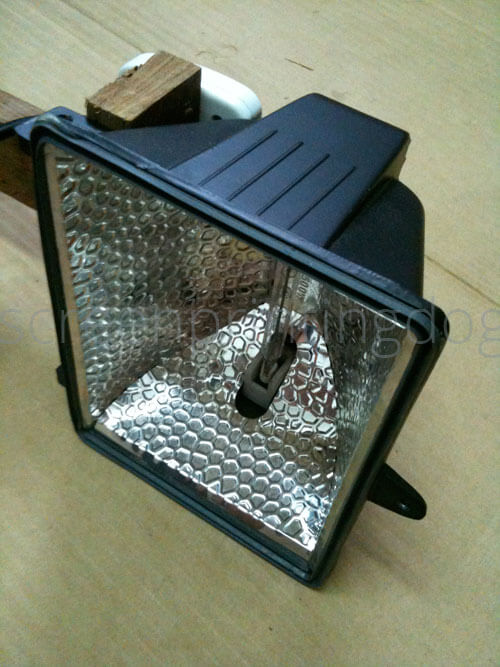
The halogen bulb emits higher levels of UVB and has a wider coverage compared to the spot heating methods mentioned previously e.g. heat guns and hair dryers.
A 300-watt halogen lamp operated at full power can instantly reach a temperature of 1000 degrees Fahrenheit. So, between a 500-watt halogen lamp and a heat gun, you are all set.
Not only that, halogen lamps heat up within seconds and are relatively portable. This allows it to have multi-uses.
I’ve used it as an exposure unit to create stencils; a flash unit between prints and for curing – placing it at least an inch or so above the t-shirt. And depending on the size of the bulb, halogen lamps are generally wider so curing an A3 image won’t take that long as compared to a hair dyer or heat gun.
Read more: How to Build a Super Easy DIY Screen Printing Exposure Unit
A halogen lamp works for both plastisol and water-based inks and is literally a one-stop heating element for DIY-ers!
Cure Scale: 4.5/5
7. The Almighty Heat Press
Walk into any screen printing facility and you’ll find the good ol’ heat press machine.
As a stable heat source designed for heat transfer applications, this is the best curing method to invest in if you’re truly committed to your t-shirt journey.

The heat press works with both plastisol and water based inks. It takes care of gelling, flashing and curing t-shirts. Think of the heat press as a giant iron! What’s even better? Most entry level heat presses these days come with a timer, pressure gauge, and temperature reader so you don’t have to worry about the little things like scorching your garments!
Read more: 8 Heat Press Features You Must Know to Avoid Regret
Once again, curing for both plastisol and water-based requires a parchment or Teflon sheet to be placed over the print area. So once the inks are in a dried (water based) or semi dried state (plastisol), set the desired temperature and press.
If you have the extra money to splurge on a heat press, I highly recommend it as it’ll help you get the job done fast, efficiently and professionally. It’s perfect for someone who sees this as a viable venture either side hustle or full time as it opens up opportunities to get into other areas of garment decoration including vinyl press, heat press transfers, Direct-to-Film printing and more!
Read more: 35 Profitable Items You Can Make With a Heat Press
Considerations to longer lasting screen prints
Proper heat setting can be a challenge, especially if you’re not working with the proper tools.
There are plenty of horror stories related to t-shirt scorching with a heat gun and avoidable burns with an iron. So while the suggestions above will work to a certain extent, you need to understand that getting a job done right requires the correct tools and methods.
In your quest to find the right method for you, also remember that the complexity of your design and choosing a suitable ink type are both crucial first steps. How small/big is your design? Single or multi-colored? Water-based or plastisol?
Read more: Starting Screen Printing – Which 3 Ink Types Should You Use?
Knowing these variables will set you to employ the right tools.
How to test your curing method
So how do you know if your screen printed tee has been cured right? You need to do both a “wash test“ and a “stretch test“.
A “wash test” is the gold standard in determining if the screen print has been properly cured. Simply launder the garment and check for noticeable differences before and after the wash.
Be aware that some fading after a wash is unavoidable. So use your judgment and determine if the amount of fading is acceptable or not. I tend to do 2 washes for the same garment – wash, dry and repeat.
If the fade is significant or part of the design has been washed off, this means the print has been under-cured. Re-evaluate your curing method if this happens.
Keep doing wash tests to continue validating your curing method. This will be especially helpful if you’ve got a big order on the line, or if you’re testing out a new curing method or ink.
Once you pass the wash test, move on to the “stretch test”.
Gently stretch the printed area and check for cracks or tears in the screen print. If there are no significant cracks and if the garment returns to its original shape, then the ink is most likely cured. Otherwise, go back to the drawing board.
Now that you know what to do and look out for, make sure you actually do these tests, it will undoubtedly save you tons of headaches and regrets later.
Read more: 15 Screen Printing Mistakes You Can Avoid to Stay Motivated!
On a closing note, you should probably determine your long-term screen printing goals – are you doing this as a hobby, or are you planning to walk down the commercial path?
Investing in the proper tools to cure screen printed T-shirts today will give you the proper motivational base to continue your screen printing journey. Good luck!
