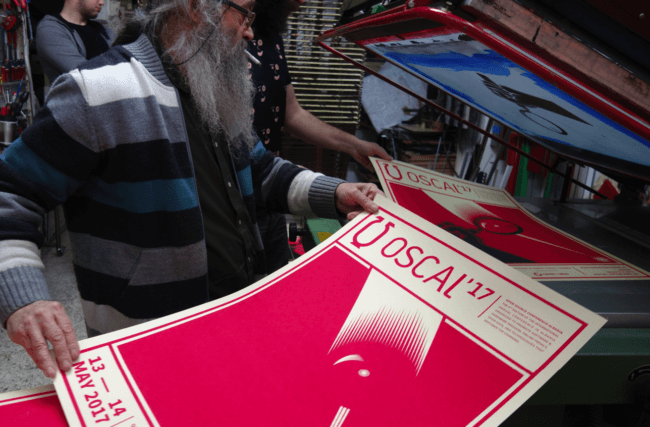
Whether you are new to the industry or an experienced screen printer, chances are you have heard the term “process screen printing” or “4-color process screen printing”.
This advanced method of printing is one the oldest and allows you to achieve amazingly realistic prints that lasts.
So what is 4-color Process Screen Printing?
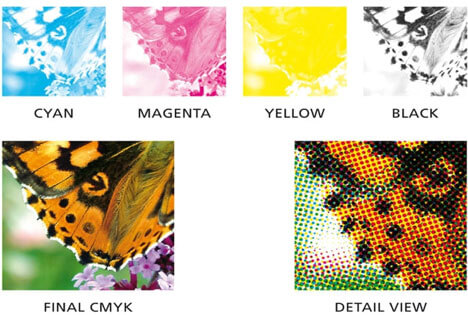
Also known as CMYK printing (and in some countries, 3D printing, before 3D printers actually became a thing) — refers to the technique or method of printing a full-color spectrum using halftones of only four ink colors overlapping each other.
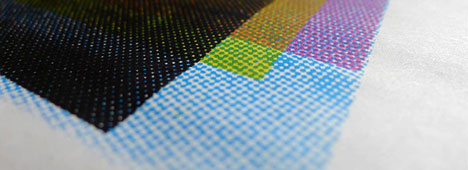
These 4 ink colors— CMYK, short for Cyan Magenta, Yellow, and Black— can be used in combination with varying degrees of transparency in order to create any color.
A four-color or CMYK process screen printing may take additional time, setups, and advance knowledge, however, screen printers offering this printing method are rewarded with beautiful, realistic prints that will definitely WOW your customers!
5 Tips For 4-color Process Screen Printing
1. Choose The Right Substrate
In a 4-color process screen printing, you will need to choose the right material to print on.
This technique is often recommended for light— usually, cream or white-colored— garments, since CMYK inks are translucent and the different color variations don’t really stand out on darker garments.
Although not commonly done, it still is possible to print a 4-color process image on a darker substrate, considering you use a white under-base in order to really make those colors pop.
In addition, the substrate should also have tight weaves. This provides the individual dots a surface on which to print. Although the weave should be tight, it is not recommended to use heavy thick materials since they can interfere with the halftones details.
2. Quality Artwork Is Key
All good screen printing starts with good artwork.
Quality becomes even more crucial when printing using the four-color process.
For this, there is only one rule—the higher the image quality, the better the print. As a matter of fact, most screen printers will use oversized artworks and images in order to achieve the detail level they need for this method.
Meanwhile, printability is also another factor to consider. Colors which may look great on your computer screen might not look great when printed on fabric. Also, doing a test print on paper does not mean that it will be the same when printed on fabric.
So, for best results, you can use test pellons or a fabric which is a similar color of the actual print job.
3. Understanding Color Separation
Color separations begin with a print-ready file using programs such as Corel Draw or Adobe Photoshop. Alternatively, you can use any separation software meant for screen printing. You also need to make sure that you only download high-resolution images.
The first thing you need to do is to change the settings of the software since most programs have default settings for paper printing. Make sure that the color separation is set to CMYK and that the color formulations used by the program line up with your inks. There are some ink companies which provide plugin files that sync the colors in your graphics program with their own ink colors.
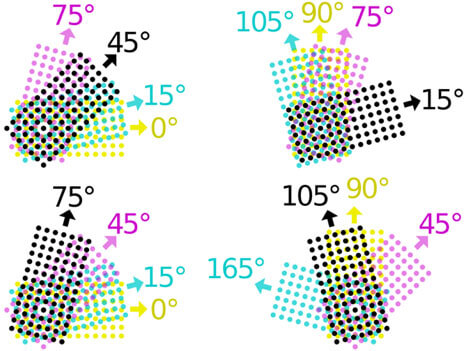
Next, you will need to adjust the screen angles. For each color, you need to follow this range:
Cyan = 55%
Magenta = 22%
Yellow = 5%
Black = 80%
The most common line count for screen printing is 26.6 lines/cm. Halftone dots should be set between 15% and 85% density.
Lastly, the dot shape also needs to be adjusted. An elliptical shape is typically used in screen printing since it works well within the squares made by the screen mesh.
4. Pay Careful Attention To Setup Details
4-color process screen printing is highly detailed. Therefore, you’ll be laying down the finest coating of each color and that will reflect on your screen printing machine setup.
This method of printing needs densely woven screens and experience screen printers recommend a high mesh count of 305 or more. The thickness of the mesh or the point weave also needs to be fine— at least 34 microns for a 305-count screen.
In addition, you need to ensure that you have adequate screen tension. Loose screens can budge during printing, so instead of snapping cleanly away from the ink, it causes blurring and wrong color mixing. For screen tension, you should use about 25 Newton per sq. cm. — not more than 30 or less than 22.
Since you’re laying down light layers of halftones, you need to create a small off-contact distance as you can, about 0.040 inches. A 70 – 75 durometer squeegee is recommended to be used in order to create a decent ink shear with the flood bars and squeegee angles on the screen printing machine should be set at least 15 degrees.
5. Getting On With Printing
The general rule to start with is to print from lightest color to the darkest. This means that your color order should be Yellow, Magenta, Cyan, and Black.
If you’re printing on a dark colored material, you’ll need to start with a white under-base, followed by Yellow and so on.
Since the goal with this screen printing process is to make the 4 colors mix to create various tones, you will need to print wet-on-wet.
There should be no flashing between colors unless you’re printing the white under-base, in which only the under-base is flash cured.
Now, the biggest challenge is laying down the same amount of ink on each substrate in order to create consistent images. This is why automatic screen printing machines work better for this method.
This doesn’t mean you can’t do it by hand. You only need to be really careful to use a single print stroke per color.
Also, the ink should be lifted and should not retouch the stencil once the print has been made, otherwise you will create a mess on your print.
In order to lay down only a light layer of ink, you will need to use a gentle print stroke with your squeegee at a lower angle.
Conclusion
So that’s the overall idea of 4-color process screen printing. It’s possibly the most technical of all printing methods but the results are amazing when you get it right.
Have you tried it? How did it work for you? Leave us your comments below!

Thanks for the informative blog I found your blog and https://pass-systemsupply.com/ very Informative keep posting